Weekly Blog 3 : Bridge and UVs 【CAGD 495】
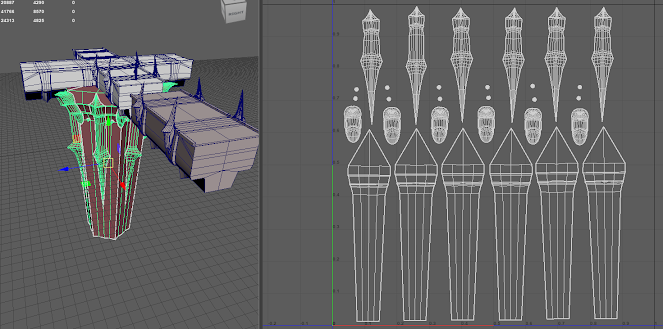
This week, I separated the detail parts and the main body part, and re-meshed them. It was hard to make the surface look natural after separating the meshes. I was carefully changing the mesh as it will keep symmetry.
First, when I created new mesh for the support of the bridge, I deleted 5 faces and left only 1 face. I used a point symmetry and duplicated for modeling, that’s why I did this process. Second, I selected looped edges around the horns and detached them to separate the meshes. By separating the meshes, I could successfully decrease the number of polygons with the same outlook. There was the other profit, it was easier to create UV. Meshes are already separated and some meshes are already ready to be unfolded nicely. I was thinking that every mesh should be connected in one object, so this changed my opinion.
Second, I deleted unnecessary looped edges and filled the hole. This process was not hard.
Third, I aligned the vertex and edge such that they look connected to the other mesh naturally. To proceed with this goal, the live surface tool was so helpful for me. When I move the vertex, it automatically snatches to the surface of the target object.
Even when I used these tools, it was hard to make the surface more smooth and natural. I think I could not make this expression if I created these pieces individually. Next time, I am going to follow these steps to create more smooth surface objects.
The last image is showing the modular spikes, to decrease polycounts.
Next week, I’ll finish up the texturing for the bridge and move to the next task.


Comments
Post a Comment